


After taking the wire off of several projects, I was left with a large container of used wire. Being the cheapo, err-- the frugal guy, that I am I wanted to reuse as much as I could; but, I had to straighten it first. While the copper will have to be heat treated again, the aluminum would be perfectly usable if I could straighten it.
I kicked it around a bit and drank a few PBRs for inspiration, this is what I came up with. I first retrieved the following items from the local Home Depot. This is what I got:
- A 3/4 x 8 inch galvanized nipple
- A 3/4 inch galvanized floor mount flange
- A 3/4 inch galvanized pipe cap

Assembly is rather, uh, straight forward, just screw it all together. Here is the assembled unit mounted on the bonsai bench.
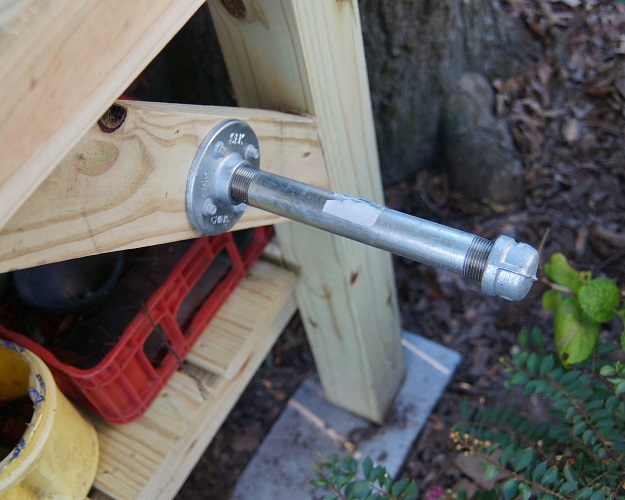
Now, you probably think that I have had to many New Castles, "How is he gonna use that to straighten wire?". It is easy, just grab the wire by the ends, you can use pliers, your hands, teeth, etc.; then just draw the wire across the nipple in a back and forth motion. It only takes a few passes to straighten the wire, even fairly thick ones. Let's take a look:
Wire before
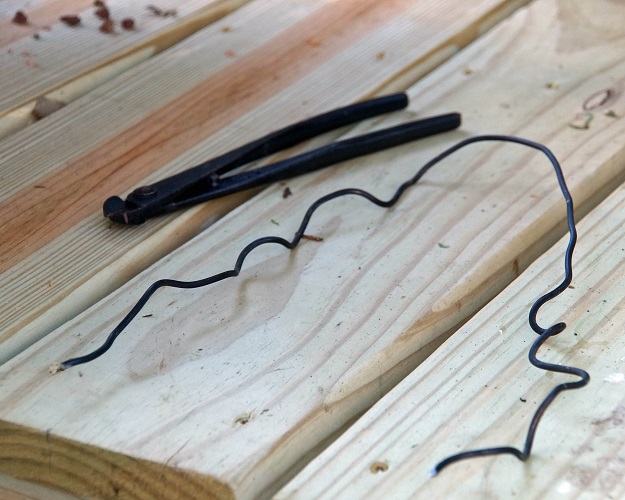
Action Shots, Favorite Minion gets the photo credit for these, you should check her out on the "About" page, she is HOTT!


After straightening
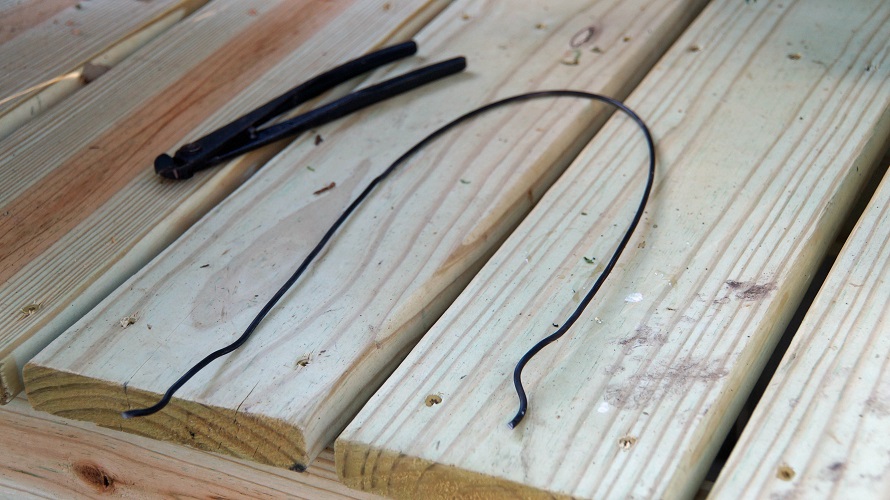
It does a pretty good job. I know this isn't the only way to do this, but it works out well for me. Having the straighter mounted on the bench allows me to straighten as I need a piece, saving a little time. Give it a try and let me know what you think.
Now, Go Wire Something...
Now, Go Wire Something...